Installation on Synology
Many pre-built NAS devices are underpowered. We generally do not recommend running Jellyfin on those devices. See: Hardware Selection for more information.
For Synology, Jellyfin is installed using Docker. In this guide, the Synology Container Manager will be used to install Jellyfin.
Prerequisites
Everything is done through the Synology web interface. This guide assumes you have already set up your Synology NAS and have access to the web interface. And your Synology NAS is running DSM 7.0 or newer. Install the "Container Manager" package from the Synology Package Center. Open the Package Center and search for "Container Manager" to find the package. For further information read this guide.
The creation and initialization of a volume will not be touched in this guide. Further information is provided by Synology
Installation
The installation is done with the Synology Container Manager.
If you don't see the icon in the main menu after the installation of Container Manager, it can be found by clicking the top left corner of the main menu.
Downloading the Jellyfin Image
Navigate to the "Registry" tab and search for "Jellyfin". You should see the official jellyfin/jellyfin image. Click on it and then click "Download".
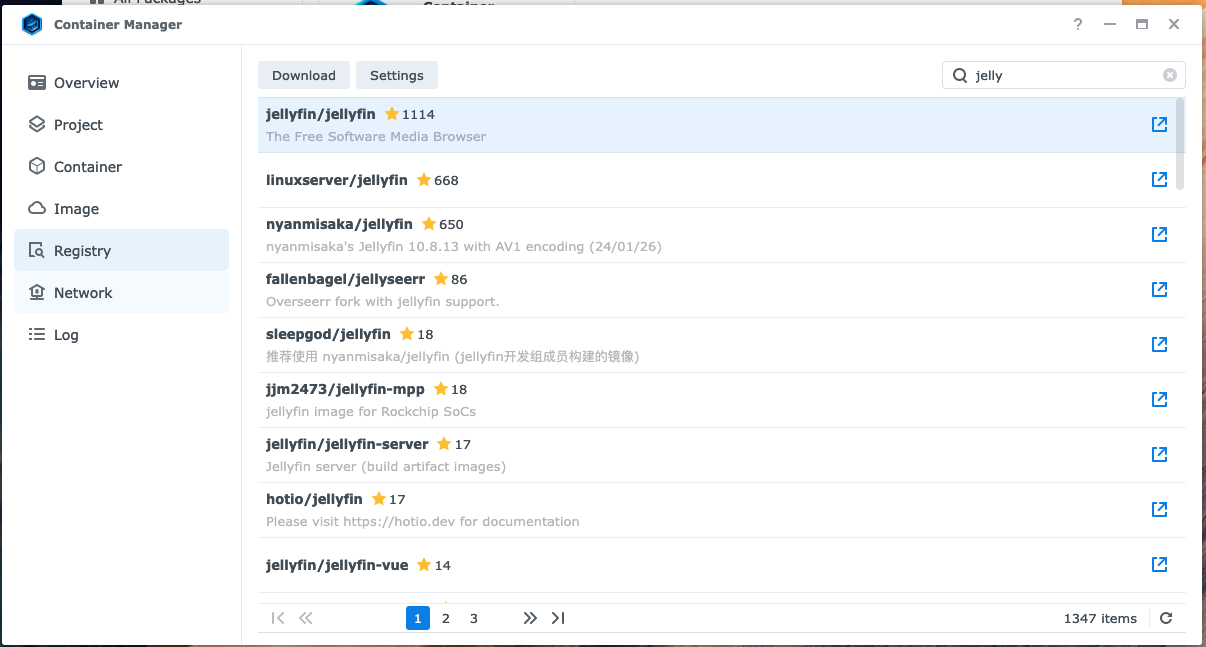
A new window will open and a Jellyfin version can be selected for installation. The latest version is recommended. Click Apply after selection a version.

After the image is downloaded, it can be found in the Image tab.
Creating the Container
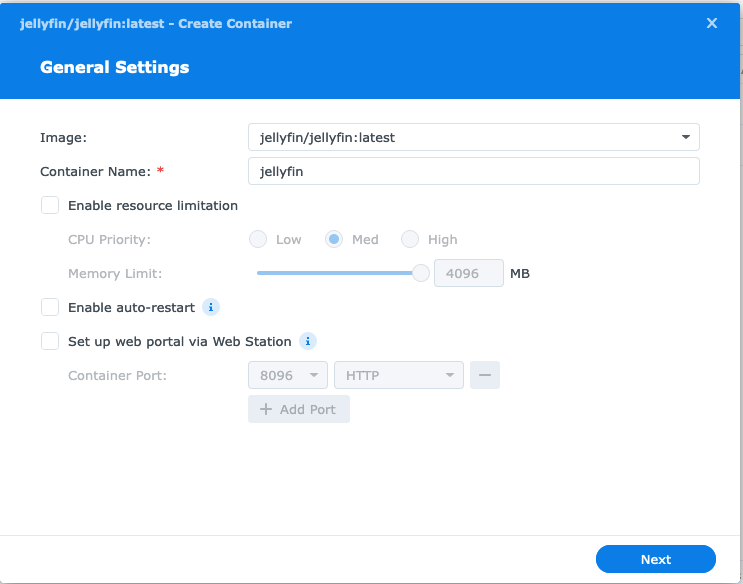
Navigate to the Container tab and click Create.
Select the Jellyfin image and give the container a name. This is mainly for identification purposes and can be set to anything desired. auto-restart can be enabled to automatically start Jellyfin when the NAS boots.
Resource limits can also be set for the container. It is recommended that all CPU resources and at least 4GB of ram be allocated to the Jellyfin container.
Click Next to proceed to the next step.
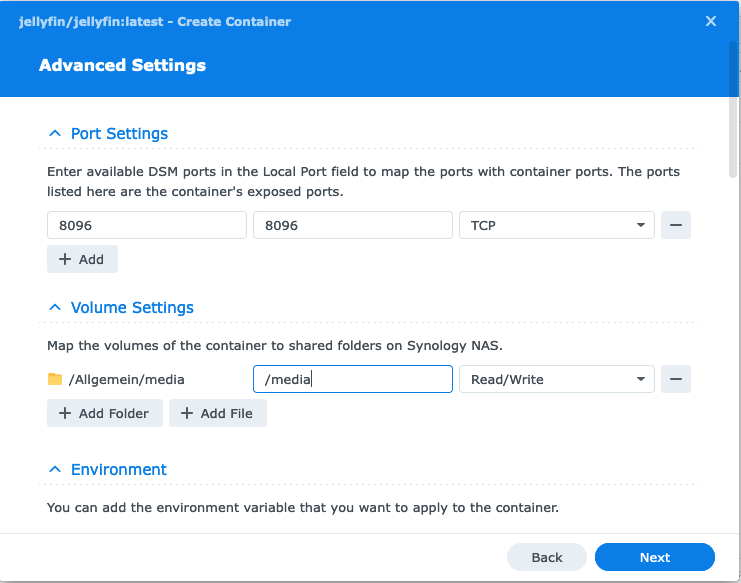
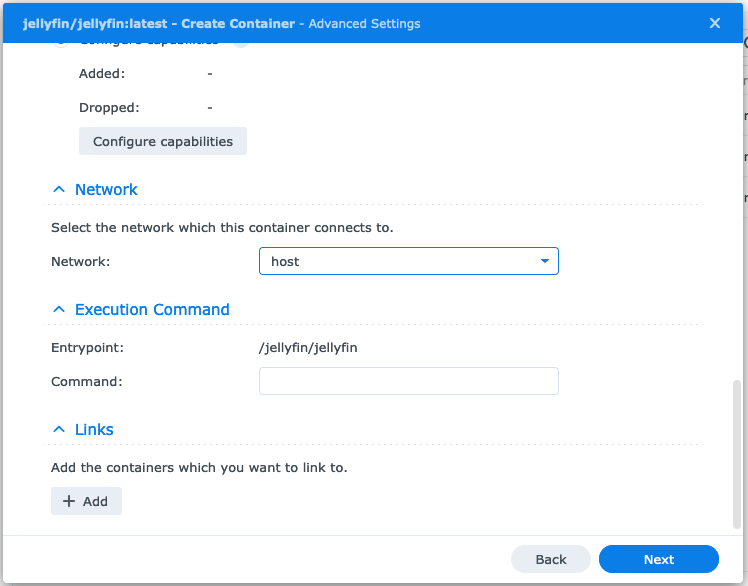
Network and Port Settings
For the Network Settings and Port Settings please refer their respected guides.
Volume Settings
This setting maps, directories on the host within the container. Use this setting to allow Jellyfin access to media and a place to store application data.
To add a volume, click "Add Folder" and select the folder desired. The mount point is set in the middle column and the directory will be accessible at this path within the container. For media files, /media can be used, and for config files, /config can be used.
Example
Your settings should look like this:
 Click
Click Next to proceed to the next step.
Settings can be reviewed on this screen. Check the Run this container after the wizard is finished checkbox and click Apply if everything looks correct. The container should now be shown in the Container tab.
Browse to http://SERVER_IP:8096 in a browser on a other device to finish setting up the Jellyfin server.
If a different port was used, replace 8096 with the port used instead.